Building a personal computer might seem intimidating for beginners, but it’s actually a straightforward process that anyone can master with the right guidance. Assembling your own PC allows you to customize components based on your specific needs while potentially saving money compared to pre-built systems. The satisfaction of creating something functional with your own hands adds an extra layer of reward to the experience.

Many first-time builders worry about damaging expensive components, but modern PC parts are designed to be user-friendly and difficult to connect incorrectly. With careful planning and basic research, even complete novices can successfully build a computer that meets their performance requirements.
This guide will walk through each step of the PC building process, from selecting compatible components to powering on your finished system for the first time. The entire process typically takes just a few hours and requires only a screwdriver and patience.
Understanding PC Components

Building a PC requires familiarity with various hardware components that work together to create a functioning computer. Each part serves a specific purpose in the overall system architecture and must be compatible with other components.
Core Hardware Explained
The CPU (Central Processing Unit) acts as the brain of your computer, executing instructions and calculations. Modern CPUs from manufacturers like Intel and AMD typically feature multiple cores for handling various tasks simultaneously.
RAM (Random Access Memory) provides temporary storage for data that the CPU needs to access quickly. More RAM generally allows for smoother multitasking and better performance in memory-intensive applications.
The motherboard serves as the central circuit board connecting all components. It contains sockets for the CPU, RAM slots, expansion slots for graphics cards, and various connectors for storage and peripherals.
Storage devices include SSDs (Solid State Drives) and HDDs (Hard Disk Drives). SSDs offer faster data access speeds but typically cost more per gigabyte than traditional HDDs.
Graphics cards (GPUs) handle visual processing tasks. While basic integrated graphics suffice for everyday computing, dedicated GPUs are essential for gaming and graphic design work.
How PC Parts Work Together
The motherboard forms the foundation of communication between components through various buses and interfaces. When you power on your PC, the CPU begins executing instructions stored in the BIOS/UEFI.
Data flows between components at different speeds depending on interface types. For example, NVMe SSDs connect directly to PCIe lanes for faster performance than SATA-based storage.
Power from the PSU (Power Supply Unit) is distributed to all components. Each part draws different amounts of electricity based on its workload and specifications.
Cooling systems prevent thermal throttling by dissipating heat generated during operation. This includes CPU coolers, case fans, and sometimes dedicated GPU cooling solutions.
The operating system manages hardware resources and provides an interface for users to interact with the computer. It coordinates how programs access CPU cores, memory, and storage.
Choosing Compatible Components
Socket type is crucial when matching CPUs and motherboards. Intel and AMD use different socket designs that change across generations, such as Intel’s LGA 1700 or AMD’s AM5.
| Component | Key Compatibility Factors |
|---|---|
| CPU | Socket type, chipset support |
| RAM | DDR generation, speed, motherboard slots |
| Graphics Card | PCIe version, physical size, power requirements |
| Storage | Connection type (SATA, M.2, NVMe), form factor |
Form factor considerations include the physical size of components. ATX, micro-ATX, and mini-ITX motherboards require appropriately sized cases and affect expansion capabilities.
Power requirements must be calculated to ensure your PSU can handle the combined load of all components. High-performance parts like powerful GPUs may need additional power connectors.
Ensure RAM matches your motherboard’s supported speeds and generation. DDR4 and DDR5 are not interchangeable, and exceeding your motherboard’s supported RAM speed will result in downclocking.
Planning Your First PC Build
Building your own PC starts with careful planning. A well-thought-out approach ensures you’ll create a system that meets your needs without wasting money on unnecessary components.
Identifying Your Needs and Budget
Start by determining what you’ll primarily use your PC for. Gaming, video editing, programming, and general use all require different hardware specifications. Write down specific applications and games you plan to run regularly.
Set a realistic budget that covers all components. Most first-time builders should allocate between $800-1500 for a mid-range system. Remember to include peripheral costs like monitors, keyboards, and mice if you don’t already own them.
Consider future-proofing within reason. Spending a bit more on a better processor or motherboard might save money in the long run, but don’t overspend on features you’ll never use.
Selecting a Build Theme or Purpose
Gaming PCs typically require stronger graphics cards and adequate cooling. Allocate 30-40% of your budget toward a quality GPU for optimal gaming performance.
Content creation builds benefit from more RAM and powerful CPUs. Video editors should prioritize processors with higher core counts and at least 16GB of RAM.
Office or general-use computers can utilize integrated graphics and focus resources on storage and reliability. These builds often cost less while still providing excellent day-to-day performance.
Consider form factor based on your space constraints. Mini-ITX builds save space but limit expansion, while mid-tower ATX cases offer better airflow and upgradeability.
Sourcing Parts and Tools
Essential Tools:
- Phillips-head screwdriver (#2)
- Anti-static wrist strap
- Cable ties
- Flashlight
- Thermal paste (if not included with CPU cooler)
Research components thoroughly before purchasing. Use PCPartPicker.com to check compatibility between parts and compare prices across retailers.
Watch for sales events like Black Friday or seasonal promotions. Component prices fluctuate throughout the year, and patience can save you significant money.
Consider both new and certified refurbished parts from reputable sellers. Many retailers offer warranties on refurbished components that can reduce costs without sacrificing reliability.
Selecting Essential Components
Building a PC requires careful selection of compatible parts that work together seamlessly. The components you choose will determine your computer’s performance, capabilities, and upgrade potential.
Motherboard Selection
The motherboard serves as the foundation of your PC build, connecting all components together. When selecting a motherboard, pay close attention to the socket type, which must match your chosen CPU.
Form factors like ATX, Micro-ATX, and Mini-ITX determine the motherboard’s size and expansion capabilities. ATX offers the most expansion slots and features, while Mini-ITX provides a compact footprint for smaller builds.
Consider the chipset carefully as it affects which features are available. High-end chipsets like Z690 or X570 support overclocking and have more PCIe lanes, while budget options like B560 or B550 offer good value with fewer extras.
Check for sufficient connectivity including USB ports, M.2 slots for SSDs, and SATA connections for storage drives. Future-proofing with newer standards like PCIe 4.0 or USB 3.2 can extend your system’s lifespan.
Choosing a CPU
The CPU (Central Processing Unit) is your computer’s brain, handling most calculations and instructions. When selecting a CPU, consider both core count and clock speed.
Core Count vs. Clock Speed:
| Use Case | Recommended Cores | Clock Speed Importance |
|---|---|---|
| Gaming | 6-8 cores | High priority |
| Content creation | 8+ cores | Medium priority |
| Office work | 4-6 cores | Low priority |
Intel and AMD offer competitive options at various price points. Intel’s 12th and 13th generation processors provide excellent gaming performance, while AMD’s Ryzen 5000 and 7000 series excel in multi-threaded workloads.
Check the CPU’s TDP (Thermal Design Power) to ensure your cooling solution can handle the heat output. Higher-performance chips typically generate more heat and require better cooling.
Picking RAM and Storage Devices
RAM (Random Access Memory) provides temporary workspace for active programs. For most builds, 16GB of DDR4 or DDR5 RAM at 3200MHz or higher offers a good balance of performance and value.
Memory configuration matters—dual-channel setups (using two matching RAM sticks) provide better performance than single-channel arrangements. Check your motherboard’s QVL (Qualified Vendor List) to ensure compatibility.
For storage, a combination of devices offers the best experience. An NVMe SSD (250-500GB) makes an excellent boot drive for your operating system and frequently used programs.
Supplement your NVMe drive with a larger SATA SSD or HDD for mass storage. HDDs offer more storage per dollar (4-8TB options are common), while SSDs provide faster access speeds but at a higher cost per gigabyte.
Graphics Card Options
The graphics card (GPU) handles visual processing and is crucial for gaming, video editing, and 3D rendering. Your choice should align with your performance needs and budget.
Entry-level GPUs like the NVIDIA GTX 1650 or AMD RX 6500 XT can handle esports titles and casual gaming at 1080p. These cards typically cost between $150-250.
Mid-range options such as the RTX 3060/3060 Ti or RX 6600 XT deliver excellent 1080p performance and good 1440p gaming. Expect to spend $300-500 in this category.
High-end cards like the RTX 3080/4070 or RX 6800 XT offer premium 1440p and 4K gaming experiences but come with price tags of $600-900.
Consider your monitor’s resolution and refresh rate when selecting a GPU. A powerful card paired with a 1080p/60Hz monitor may represent wasted potential.
Choosing Supporting Parts
Beyond the core components, selecting the right supporting parts ensures your PC runs efficiently and reliably. These components provide power, housing, and temperature management essential for optimal performance.
Power Supply Considerations
Power supplies are often overlooked but critically important. Select a PSU with sufficient wattage for your system’s needs, typically 550-750W for mid-range builds and 850W+ for high-performance systems.
Look for 80 Plus certification (Bronze, Silver, Gold, Platinum) which indicates efficiency. Higher certification means less electricity wasted as heat and lower power bills.
Modular PSUs allow you to connect only the cables you need, reducing clutter inside your case. This improves airflow and makes cable management easier.
Pay attention to the PSU’s physical dimensions to ensure it fits in your chosen case. Some compact cases require SFX power supplies rather than standard ATX units.
Case Selection and Form Factors
Cases come in several standard sizes: Full Tower, Mid Tower, Mini-ITX, and Micro-ATX. Your motherboard form factor must be compatible with your case size.
Consider front panel connections like USB ports, audio jacks, and power buttons. Modern cases should offer USB 3.0 or USB-C ports for faster data transfer.
Check for adequate clearance for components, especially GPU length, CPU cooler height, and radiator space. Specifications are usually available on the manufacturer’s website.
Cable management features like rubber grommets, dedicated routing channels, and back panel space make building neater and improve airflow. These details make a significant difference in both aesthetics and cooling performance.
Cooling Solutions
Effective cooling prevents thermal throttling and extends component lifespan. Most CPUs include stock coolers sufficient for basic use, but aftermarket options provide better performance.
Air cooling options:
- Tower coolers (best performance/value)
- Low-profile coolers (for compact cases)
- Passive coolers (silent operation)
Liquid cooling options:
- All-in-one (AIO) liquid coolers
- Custom loop cooling (advanced users)
Case fans create airflow through your system. Install fans in a configuration that brings cool air in from the front/bottom and exhausts warm air out the top/rear.
Fan sizes typically range from 80mm to 200mm, with larger fans providing more airflow at lower noise levels. Quality fans with fluid dynamic or magnetic bearings offer longer lifespans and quieter operation.
Pre-Build Preparation
Before diving into building your PC, proper preparation ensures a smooth assembly process and helps avoid potential issues. Taking time to organize your workspace and test components can save hours of troubleshooting later.
Pre-Assembling and Testing Components
Begin by unpacking all components and checking them against your purchase list. Verify that nothing is missing or damaged before removing protective packaging.
Connect your motherboard to the power supply on a non-conductive surface like the motherboard box. Install the CPU, CPU cooler, and RAM according to their manuals. This minimal setup allows for a basic power-on test.
Connect the monitor to the motherboard’s video output. When powering on, you should see the BIOS screen appear. This test confirms that your core components are functioning properly.
If no display appears, check all connections and ensure RAM is properly seated. Testing components before final assembly makes troubleshooting much simpler if problems arise.
Gathering Tools and Workspace Organization
A Phillips screwdriver (#1 and #2) is essential for PC building. Additional helpful tools include:
- Needle-nose pliers for tight spaces
- Cable ties for organization
- Anti-static wrist strap to prevent damage
- Flashlight for seeing into the case
- Isopropyl alcohol and microfiber cloths for cleaning
Choose a large, well-lit workspace with a hard, clean surface. Avoid carpeted areas which generate static electricity.
Organize small parts like screws into separate containers. This prevents loss and confusion during assembly. Keep component manuals accessible for reference.
Have a device nearby to access online tutorials if needed. Proper workspace organization significantly reduces build time and minimizes the risk of component damage.
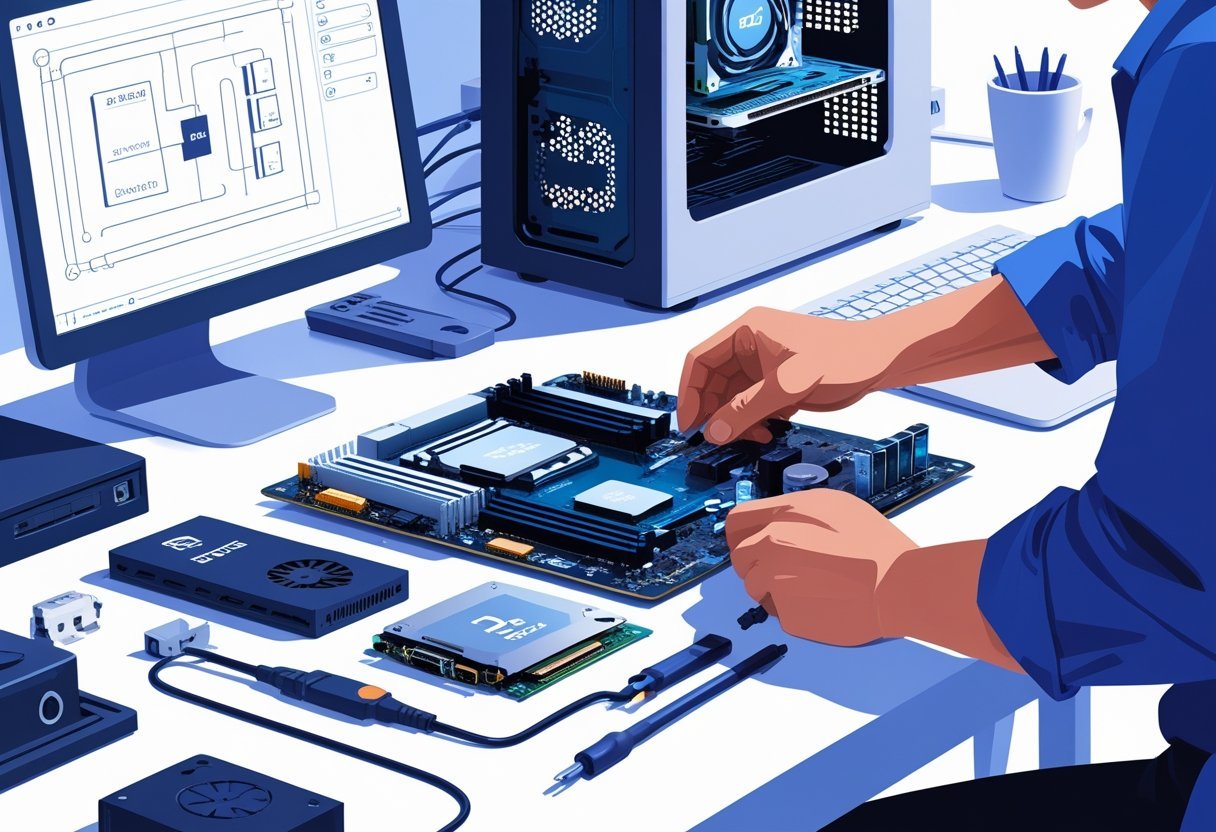
Step-by-Step Assembly Guide
Assembling a PC requires attention to detail and a methodical approach. Following a logical order helps prevent mistakes and ensures all components are properly installed.
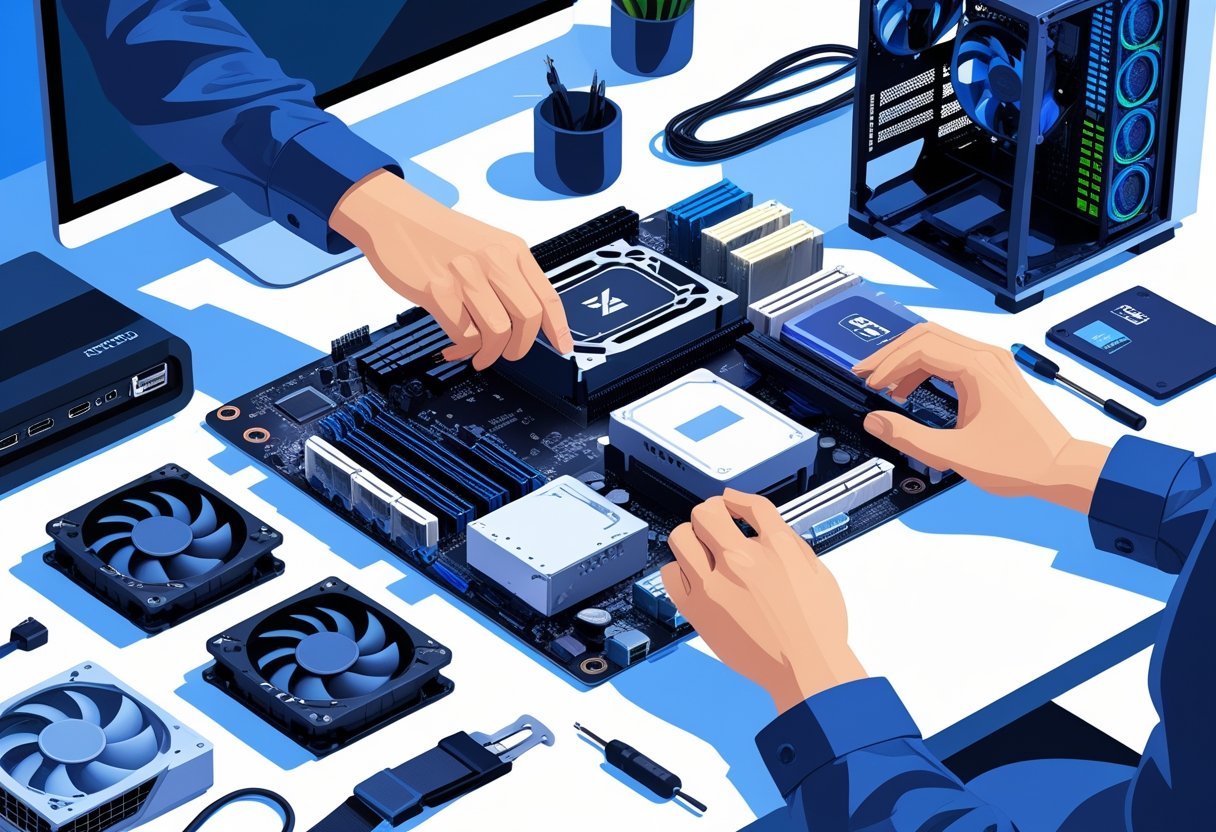
Installing the CPU and RAM
Begin by opening the CPU socket on the motherboard by lifting the retention arm. Align the CPU with the socket, matching the triangular markers on both components. Gently place the CPU in the socket without applying pressure—it should drop in easily.
Lower the retention arm to secure the CPU. Apply a pea-sized dot of thermal paste to the center of the CPU if your cooler doesn’t come with pre-applied paste.
Mount the CPU cooler according to the manufacturer’s instructions. This typically involves aligning the cooler with mounting holes and securing it with screws or clips.
For RAM installation, open the retention clips on the memory slots. Align the notch on the RAM module with the ridge in the slot. Press down firmly on both ends of the RAM module until the retention clips snap into place.
Mounting the Motherboard and Case Hardware
Before installing the motherboard, insert the I/O shield into the rear case opening. It should snap into place from inside the case.
Install standoffs in the case at the points that align with your motherboard’s screw holes. These create necessary spacing between the motherboard and metal case.
Carefully lower the motherboard into the case, aligning it with the I/O shield and standoffs. Secure the motherboard with screws, but don’t overtighten them.
Next, install storage drives in their appropriate bays. For 2.5″ SSDs and 3.5″ HDDs, use the provided screws or tool-free mechanisms to secure them.
Connect the front panel connectors (power switch, reset button, LED indicators) to the appropriate pins on the motherboard. Refer to your motherboard manual for the exact pin layout.
Installing Storage and Graphics Card
Adding storage drives and your graphics card are essential steps in your PC build. These components provide space for your data and power for displaying graphics on your screen.
Adding Drives
Most modern builds use a combination of SSD (Solid State Drive) and HDD (Hard Disk Drive) storage. SSDs offer faster performance while HDDs provide more storage at a lower cost.
For M.2 NVMe SSDs, locate the M.2 slot on your motherboard. Remove the tiny retention screw first, then insert the SSD at a 30-degree angle into the slot. Gently press it down and secure it with the retention screw.
For 2.5-inch SSDs or HDDs, connect the SATA data cable to the drive and to the motherboard SATA port. Then attach a power cable from the power supply to the drive.
Mount drives in the appropriate bays in your case. Many cases have tool-free drive bays or trays that slide out for easy installation.
Graphics Card Installation
The graphics card (GPU) typically represents one of the largest components in your build. Before installation, remove the appropriate PCIe slot covers from the back of your case.
Align your graphics card with the PCIe x16 slot on your motherboard. This is usually the topmost and longest PCIe slot. Apply even pressure to seat the card fully until the retention clip clicks.
Secure the card’s bracket to the case using screws. Don’t skip this step as it prevents stress on the motherboard connection.
Connect power cables from your power supply to the GPU if required. Most modern graphics cards need 6-pin or 8-pin PCIe power connectors.
Double-check that the card is seated properly and all cables are connected before proceeding to the next step in your build.
Connecting Power and Cables
Properly connecting power cables and managing them is crucial for both functionality and aesthetics in your PC build. Getting these connections right ensures your components receive adequate power while good cable management improves airflow and makes troubleshooting easier.
Power Supply Connections
The power supply unit (PSU) connects to various components through specific cables. The 24-pin motherboard connector is the main power source for your motherboard and must be firmly seated until it clicks.
Your CPU requires either an 8-pin or 4+4-pin connector that plugs into the top corner of the motherboard. This connection provides dedicated power to the processor.
Graphics cards typically need 6-pin or 8-pin PCIe power connectors, with high-end models sometimes requiring multiple connections. Always use all the required power connectors for proper GPU performance.
Storage devices and case fans use SATA power connectors with their L-shaped design. Molex connectors (round 4-pin) may be needed for older devices or certain case accessories.
Double-check all connections before powering on your system. Loose connections can cause system instability or prevent startup.
Cable Management Techniques
Start cable management by planning your cable routes before making permanent connections. Use the dedicated cable routing channels built into modern cases.
Zip ties and Velcro straps are essential tools for bundling similar cables together. Group power cables separately from data cables to minimize electromagnetic interference.
Modern cases offer cable management compartments behind the motherboard tray. Route as many cables as possible through these spaces to keep the main chamber clean.
Use cable combs for visible power cables to create clean, parallel lines for custom builds. These inexpensive accessories dramatically improve the visual appeal of exposed cables.
Consider the airflow impact of your cable arrangement. Poorly managed cables can obstruct fans and create heat pockets, reducing cooling efficiency.
For particularly difficult builds, custom-length cables or cable extensions can provide exactly the right length needed without excess slack.
Initial System Boot and BIOS Setup
Booting your newly assembled PC for the first time is an exciting milestone. This critical phase requires attention to proper power-on procedures and configuring essential BIOS settings to ensure your system runs optimally.
Powering On and Troubleshooting Beep Codes
Before pressing the power button, double-check that all components are properly seated and all power connections are secure. Connect your monitor to the graphics card (not the motherboard) if you’ve installed a dedicated GPU.
Press the power button and watch for signs of life. The fans should spin up, LEDs should illuminate, and you should hear a single beep from the system speaker if installed.
If you hear multiple beeps or no beeps with no display, your motherboard is communicating an error code. Common beep patterns include:
| Beep Pattern | Common Meaning |
|---|---|
| 1 short beep | Normal boot process |
| 2 short beeps | BIOS/CMOS issue |
| 3 short beeps | Memory error |
| 1 long, 2 short | Video card problem |
Consult your motherboard manual for the specific beep code meanings for your particular model.
Configuring BIOS Settings
Once your PC successfully powers on, you’ll need to enter the BIOS/UEFI setup. Press the designated key during startup (often Del, F2, or F10 – check your motherboard documentation for specifics).
Within BIOS, verify that all hardware components are properly detected. Check that your RAM is running at its advertised speed – you may need to enable XMP/DOCP profiles to achieve full performance.
Set your boot order to prioritize your installation media (USB or DVD) for the upcoming operating system installation. This ensures the computer will boot from this device rather than searching for an operating system on your empty drives.
Adjust fan curves for optimal cooling and noise levels. Most modern BIOS interfaces allow granular control over system fans based on temperature thresholds.
Consider enabling secure boot for added security if you’re installing Windows. For advanced users, explore CPU settings like enabling virtualization support if you plan to use virtual machines.
Installing Operating System and Drivers
After assembling your PC hardware, you’ll need to install an operating system and the necessary drivers to make everything function properly. This critical step transforms your collection of components into a fully functional computer.
Operating System Installation Process
Creating a bootable installation drive is the first step in installing your operating system. You’ll need a USB drive (8GB or larger) and access to another computer to download the OS installation files. For Windows, use the Media Creation Tool from Microsoft’s website. For Linux distributions, use tools like Rufus or Etcher to create the bootable drive.
Insert your bootable USB drive into the new PC and power it on. Access the BIOS/UEFI by pressing the designated key during startup (often Delete, F2, or F12). Navigate to the boot menu and select your USB drive as the primary boot device.
Follow the on-screen instructions during the installation process. You’ll need to select language preferences, enter your product key (for Windows), choose installation type, and create partitions on your storage drive.
Driver and Firmware Installation
After installing the operating system, you’ll need to install drivers for your hardware components. Drivers are software that allow your operating system to communicate with hardware devices. Start with chipset drivers, followed by graphics, audio, network, and other component drivers.
For motherboards and graphics cards, visit the manufacturer’s website to download the latest drivers. Many components come with installation discs, but these often contain outdated drivers.
Windows Update can automatically install many basic drivers, but specialized hardware like graphics cards requires dedicated software. NVIDIA and AMD offer their own driver management software (GeForce Experience and Radeon Software).
Consider using driver management software like Driver Booster or Snappy Driver Installer for a streamlined experience. However, be cautious with automatic driver installation tools, as they may install unnecessary software.
Testing and Optimizing Your Build
Once your PC is assembled and boots successfully, it’s time to ensure everything works properly and performs at its best. This involves thorough testing to verify stability and fine-tuning various settings to optimize performance.
System Stability and Stress Testing
Before using your new PC for daily tasks, verify its stability under load. Run a system stress test for at least one hour to ensure all components function properly when pushed to their limits. Software like Prime95 and AIDA64 can test your CPU, while FurMark is excellent for GPU stress testing.
Monitor temperatures during testing – most CPUs should stay below 80°C under full load, while GPUs typically perform best under 85°C. If temperatures exceed these thresholds, check your cooling solution.
Memory stability is crucial for system reliability. Use Memtest86+ to verify RAM functionality by running it overnight for at least 4 passes. Any errors indicate potential hardware issues that require attention.
The Windows Memory Diagnostic tool provides a built-in alternative for basic memory testing.
Performance Tuning and Monitoring
After confirming system stability, focus on performance optimization. Install the latest drivers for all components, particularly your GPU, to ensure maximum compatibility and performance.
Monitor system performance using tools like HWiNFO64 or MSI Afterburner to track temperatures, clock speeds, and usage statistics during gaming or intensive tasks.
Consider these optimization steps:
- BIOS settings: Enable XMP/DOCP profiles to run RAM at advertised speeds
- Windows power plan: Set to “Balanced” or “High Performance” depending on your needs
- Storage optimization: Ensure SSDs have at least 10% free space for optimal performance
For gaming PCs, explore GPU overclocking using software like MSI Afterburner, starting with conservative adjustments to core and memory clocks. Always test stability after each change.
Upgrading and Maintaining Your PC
Once your PC build is complete, you’ll need to perform regular maintenance and plan for future upgrades. Proper care extends your computer’s lifespan while strategic upgrades keep it performing optimally without requiring a complete rebuild.
Identifying Future Upgrade Paths
Component upgrades allow your PC to stay relevant without building from scratch. The graphics card (GPU) is typically the first component to show its age, especially for gaming enthusiasts. Most systems can accept a newer GPU without other modifications, provided the power supply has sufficient wattage.
RAM upgrades offer significant performance improvements for multitasking. Check your motherboard specifications for maximum supported memory and compatible RAM types before purchasing additional sticks.
Storage expansions are straightforward upgrades that don’t require extensive technical knowledge. Adding an SSD to a system with only mechanical drives dramatically improves load times and overall responsiveness.
Processor (CPU) upgrades are more complex as they require compatibility with your existing motherboard socket. Research your motherboard’s CPU compatibility list before considering this upgrade path.
Routine Maintenance Tips
Physical Maintenance:
- Clean dust from components every 3-6 months using compressed air
- Check and replace thermal paste on CPU every 2-3 years
- Inspect case fans for proper operation annually
Dust accumulation is the primary enemy of PC components, causing increased temperatures and reduced performance. Always power down and unplug your system before cleaning internal components.
Software Maintenance:
- Update drivers regularly, especially GPU drivers
- Run disk cleanup and defragmentation (for HDDs only, not SSDs)
- Uninstall unused programs to free system resources
Monitor temperatures using software like HWMonitor or MSI Afterburner. Abnormal temperature spikes may indicate cooling issues requiring immediate attention.
Backup important data regularly to external drives or cloud storage. Hardware failures happen unexpectedly, and proper backups prevent catastrophic data loss.
Troubleshooting Common Issues
Even carefully planned PC builds can encounter problems. Recognizing and solving these issues is an essential skill for any builder.
No Power or No Display – First, check all power connections. Ensure the power supply is switched on and properly connected to the motherboard. Verify RAM modules are fully seated in their slots.
Computer Powers On But No Display – Check if your monitor is connected to the correct video output. For systems with dedicated graphics cards, connect the display to the GPU ports, not the motherboard.
Beep Codes can help diagnose problems. Consult your motherboard manual to interpret these audio signals, as they indicate specific hardware issues.
Common POST Error Solutions:
| Problem | Possible Solution |
|---|---|
| System won’t boot | Clear CMOS by removing the motherboard battery for 30 seconds |
| RAM issues | Try one RAM stick at a time in different slots |
| CPU overheating | Check cooler mounting and thermal paste application |
If components power on (fans spinning, lights on) but nothing displays, try removing all non-essential components. Start with only CPU, cooler, one RAM stick, and power supply.
Driver Issues after successful boot often cause instability. Visit manufacturer websites for the latest drivers rather than relying on automatically installed versions.
Remember that patience is key. Troubleshooting can be time-consuming but is rarely impossible to resolve.
Safety Precautions and Best Practices
Building a PC involves handling sensitive electronic components that can be damaged by static electricity. Always work on a hard, non-carpeted surface to minimize static buildup.
Ground yourself before touching any components by touching a metal part of the PC case or using an anti-static wrist strap. This simple step prevents potentially damaging electrostatic discharge.
Keep your workspace clean and organized. Scattered screws or tools can damage components or get lost during the building process.
Handle components with care, especially the CPU and RAM. Never force components into place—if significant resistance is felt, stop and verify alignment.
Most components should only fit one way. Pay attention to notches and orientation markers on parts like RAM sticks and expansion cards.
Keep liquids away from your workspace. Spills can cause permanent damage to electronic components and create electrical hazards.
| Component | Handling Tips |
|---|---|
| CPU | Hold by edges, never touch pins |
| Motherboard | Support from underneath, avoid touching circuits |
| RAM | Hold by sides, align notches carefully |
| GPU | Handle by edges, avoid touching contacts |
Read manuals thoroughly before installation. Manufacturer instructions often contain specific safety information for their products.
Take breaks when needed. Fatigue can lead to mistakes or accidents. A fresh perspective often helps solve assembly challenges.